

Post-adhesive skin care after CGM removal – soothe and protect

You’ve worn your CGM patch like a champ. It stayed on through workouts, hot showers, late nights – and now it’s time to peel it off. But what’s left behind? A bit of sticky residue, some redness, maybe even a sting.
Sound familiar?
Whether you’re using Dexcom, Libre, Omnipod or infusion sets, post-adhesive skin care isn’t just about feeling fresh – it’s about keeping your skin healthy for the next patch. And trust us, a few simple habits can make a massive difference.
Here’s your go-to guide for soothing, cleaning, and protecting your skin after patch removal – no fuss, no guesswork.
What happens to your skin after a patch?
When you remove your CGM patch, your skin’s natural barrier may be a bit stressed. Think of it like peeling off a stubborn bandage – there’s tension, friction, and sometimes a bit of skin disruption.
Common signs you’ve pushed it too far:
- Redness or imprinting from the adhesive ring
- Flaky, dry, or itchy skin where the patch sat
- A warm or irritated feeling post-removal
- Sticky leftover residue
While not serious in most cases, these symptoms can affect how well your next patch sticks – and how comfortable it feels.
Step-by-step recovery routine
Right, so let’s get into it. Here’s what to do the moment your patch comes off:
1. Remove residue (without scrubbing)
Don’t go at it with raw determination. That leftover stickiness? It needs a gentle touch. Use a skin-safe adhesive remover or a bit of olive or coconut oil on a soft cloth. Let it sit for a few seconds, then wipe gently.
Avoid alcohol-based removers unless absolutely necessary – they dry out the skin and can cause stinging.
2. Rinse and pat dry
After cleaning, rinse the area with lukewarm water and pat dry with a clean towel. No need for fancy soaps – just keep it simple and fragrance-free.
3. Rebalance the skin
This is where your skin says thank you. Use a light moisturiser or a post-adhesive soothing gel – ideally one with aloe vera, oat extract or panthenol. These ingredients are known to calm irritation and rebuild the moisture barrier.
If you have very sensitive skin, patch test first or use a plain barrier cream like petroleum jelly or zinc ointment.
Those with sensitive skin types or a history of irritation from adhesives may want to consider CGM patches specifically designed for delicate areas – these options are often made with hypoallergenic materials to reduce flare-ups.
4. Give it a break
Rotate your sensor site, and let the skin breathe for at least a day before reapplying to the same area. If that’s not possible, try using a Tape Roll (Cut to Fit) for a gentler, customised application that reduces edge pressure.

Dermatologist-approved ingredients to look for
Here’s a quick ingredient cheat sheet when shopping for post-removal care:
|
Ingredient |
What it does |
Notes |
|
Aloe vera |
Soothes, cools, reduces redness |
Ideal for mild irritation |
|
Panthenol (Pro-Vitamin B5) |
Promotes healing, hydrates deeply |
Often in barrier creams |
|
Colloidal oatmeal |
Reduces itching and inflammation |
Gentle for eczema-prone skin |
|
Petrolatum |
Seals moisture, protects healing skin |
Use thinly to avoid clogging pores |
|
Witch hazel |
Natural astringent, reduces swelling |
Only use alcohol-free formulations |
Avoid perfumes, dyes, alcohols, and anything “tingly” – your skin’s had enough drama.
Universal skin care tips for CGM users
These tips work no matter your sensor brand or skin type:
- Prep counts – Taking the time to prepare your skin properly before applying your patch can help avoid post-removal issues.
- Rotate regularly – Don’t keep using the same spot. It increases the chance of skin thinning or pigmentation changes.
- Hydrate daily – Well-moisturised skin tolerates adhesive better and recovers faster.
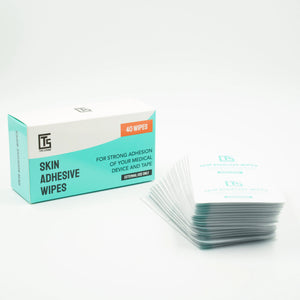
- Consider barrier sprays or wipes – They create a protective layer without affecting stickiness.
-
Avoid high-friction zones during warmer months – Increased heat and sweat can irritate already stressed skin. Learn how summer weather impacts sensors.
Real-world wisdom
Plenty of folks in the T1D community have shared their own patch-aftercare tips. Here’s what works for them:
“I apply aloe gel straight away, then moisturise before bed. The skin feels fine the next morning – no more patch rings!” – Jess, Brisbane
“Switching to patches that let my skin breathe more made the biggest difference. Especially in summer.” – Leo, Gold Coast
If you’re after something gentler on the skin, the breathable options in our CGM Patches Collection are worth a look – especially our Dexcom G6 Adhesive Patches and Freestyle Libre Patches, both designed to protect without smothering.
If you’ve ever dealt with a patch that starts peeling early or doesn’t hold up to daily wear, that’s often a sign it isn’t quite right for your routine. Here’s how to spot a patch that’s too weak – and what to do about it.

When to seek help
A bit of redness is normal. But if you notice blistering, persistent burning, or rashes that spread beyond the patch area, it’s time to check in with a GP or dermatologist. These may be signs of allergic contact dermatitis or a skin infection – both manageable, but not to ignore.
If you're not sure whether it’s irritation or something more, here’s how to recognise patch-related skin reactions early.
Final thought
Your CGM is here to help you stay in control – not wreck your skin in the process. A few mindful steps after each patch removal can keep your skin calm, clean and ready for the next round.
And if you’re after skin-friendly options that do the job without causing chaos, shop the full Type Strong patch collection.


